Page level Tip
Click on the Personalize Page link at the top-right corner of the page.
Click on the Complete View radio button.
Click on the Expand All link.
On the top line of the page (Page Layout: Oracle Self Service Human Resources: Absence Management), select the Create Item icon as shown in the following screenshot:

From the Level drop-down list, select Site.
Complete the properties of the item as per the following table:

Click on the Apply button.
Scroll down to the bottom of the application and click on the Return to Application link.
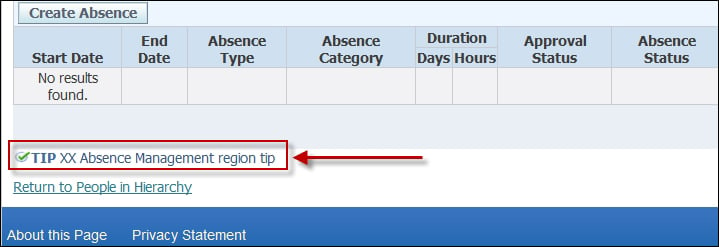
Item Level Tip Message:
To create a message, perform the following steps:
Log in to Oracle with the Application Developer responsibility.
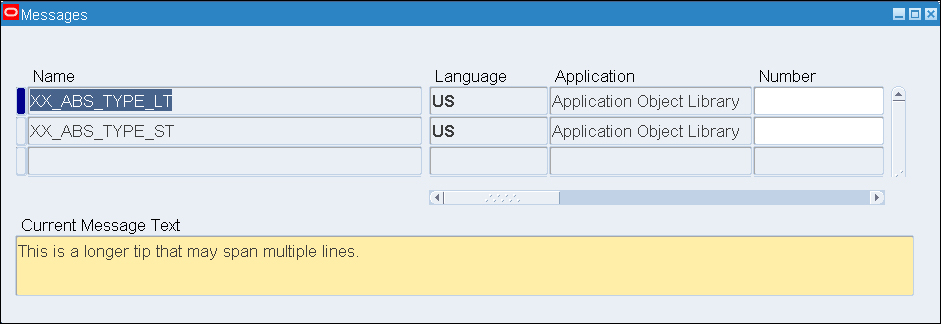
Navigate to Application | Messages and the Messages window will open.
Create a new message with the following data:
Save the form.
Create the second message with the following data:
Save and exit the form.
The form should appear as shown in the following screenshot (the image has been amended to remove blank lines):
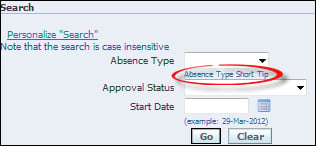
We are now going to create a personalization that will add a short tip to a self-service screen. The short tip called XX_ABS_TYPE_ST will reference the message that we have just created.
To add a short tooltip on an item, perform the following steps:
Log in to Oracle with
XXUSERand select the XxResp responsibility.Navigate to Absence Management.
Click on the Action item.
Under the Absence Summary tab, click on the Personalize Search link in the Search region.
Click on the Personalize icon for the Message Choice: Absence Type item.
Click on the Choose Levels Displayed button.
Shift all of the items other than Site and Responsibility back to the Available Levels side as summarized in the following screenshot:

Click on the Apply button.
Set Tip Message Name at responsibility level of XX_ABS_TYPE_ST.
Set Tip Type at the Responsibility level to shortTip as shown in the following screenshot:

Click on the Apply button.
Click on the Return to Application link.
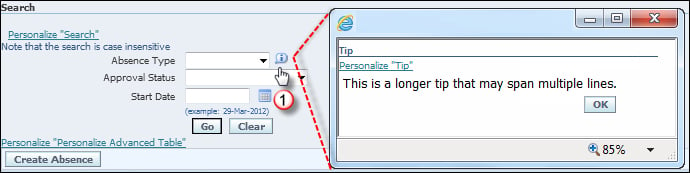
We are now going to create a personalization that will add a long tip to a self-service screen. The short tip will reference the message we have just created called XX_ABS_TYPE_LT. We will see the difference between the tips we have created and how they are displayed on the screen.
To add a long tool tip on an item, perform the following steps:
Log in to Oracle with
XXUSERand select the XxResp responsibility.Navigate to Home | Absence Management.
Click on the Action icon for an employee record.
Under the Absence Summary tab, click on the Personalize "Search" link in the Search region.
Click on the Personalize icon for the Message Choice: Absence Type item.
Click on the Choose Levels Displayed button.
Shift all of the items other than Site and Responsibility back to the Available Levels side.
Click on the Apply button.
Set Tip Message Name to the responsibility level XX_ABS_TYPE_LT.
Set Tip Type to the responsibility level longMessage, as shown in the following screenshot:

Click on the Apply button.